If you want to know how to upscale video from 480p, 720p or 1080p to a sharper HD or 4K file, the good news is that you do not need a Hollywood budget. Free tools can resize footage cleanly, and AI upscalers can rebuild a surprising amount of edge detail in old clips, phone videos and webinar recordings. The catch is that every method has limits, and the files get big fast. In this guide I explain what upscaling actually does, which free and paid tools are worth using in 2026, and a simple workflow that protects your originals.
🔍 Checked on 9 Nov 2026: Topaz Video is a subscription listed at $299 a year on topazlabs.com; DaVinci Resolve is free, while Super Scale needs the paid Studio version (list price $295, one-time). FFmpeg, HandBrake and Video2X are free. Prices are in US dollars before tax and can change.
✔ Key takeaways
⏱ About 11 min read · the short version is right here
- Video upscaling increases the pixel count of a video, for example from 720p to 1080p or 4K, so it fills a larger screen without looking blocky.
- Classic scaling (Lanczos or bicubic) is fast and free but adds no real detail; AI upscaling predicts detail and can look much sharper.
- Free options: FFmpeg and HandBrake for clean resizes, Video2X for open-source AI upscaling. Paid: Topaz Video, DaVinci Resolve Studio Super Scale.
- Always test a 10-second clip, compare it side by side with the original and check faces and text before you render the whole file.
- 4K masters are large. Keep the original, the upscaled master and a backup, with one copy off-site or in the cloud.
📋 In this guide
What is video upscaling?
Video upscaling means increasing the resolution of a video so it has more pixels than it was recorded with. A 720p clip is 1280 x 720 pixels; upscale it to 1080p and it becomes 1920 x 1080, or to 4K and it becomes 3840 x 2160. The new pixels have to come from somewhere, and how a tool creates them is what separates a soft, smeary result from a crisp one.
You run into this more often than you might think. Old family videos and DVD rips look tiny on a modern TV. Screen recordings, Zoom calls and webinar replays are often exported at 720p. Small businesses reuse older product clips or client testimonials in new 1080p or 4K edits, and stock footage does not always match the timeline. Your TV, phone and media player already upscale everything they show in real time, but doing it yourself, with a better algorithm, usually gives a cleaner file you can edit, publish and archive.
💡 Upscaling vs. downscaling
Downscaling (4K to 1080p) throws pixels away and almost always looks good. Upscaling has to invent pixels, which is why tool choice and source quality matter so much more.
Does upscaling improve video quality?
It depends on the method. Traditional upscaling uses maths such as bicubic or Lanczos interpolation to estimate each new pixel from its neighbours. The result is bigger and smoother, but it contains no new information. A blurry 480p face stays a blurry face, just on more pixels.
AI upscaling works differently. Models trained on millions of low- and high-resolution image pairs predict what fine detail probably looked like: hair, fabric, edges of text, brick textures. Video-specific models also look across several neighbouring frames, which reduces flicker and lets them borrow detail from frames where the subject was sharper. On good sources the improvement is real. On heavily compressed or very noisy sources, AI can produce plastic skin, shimmering patterns or made-up detail, so you still need to judge the output with your own eyes.
⚠️ The honest limit
No tool recovers detail that was never captured. If a licence plate or a face is a few pixels wide in the original, an upscaler can only guess, and the guess may be wrong.
Upscaling methods compared
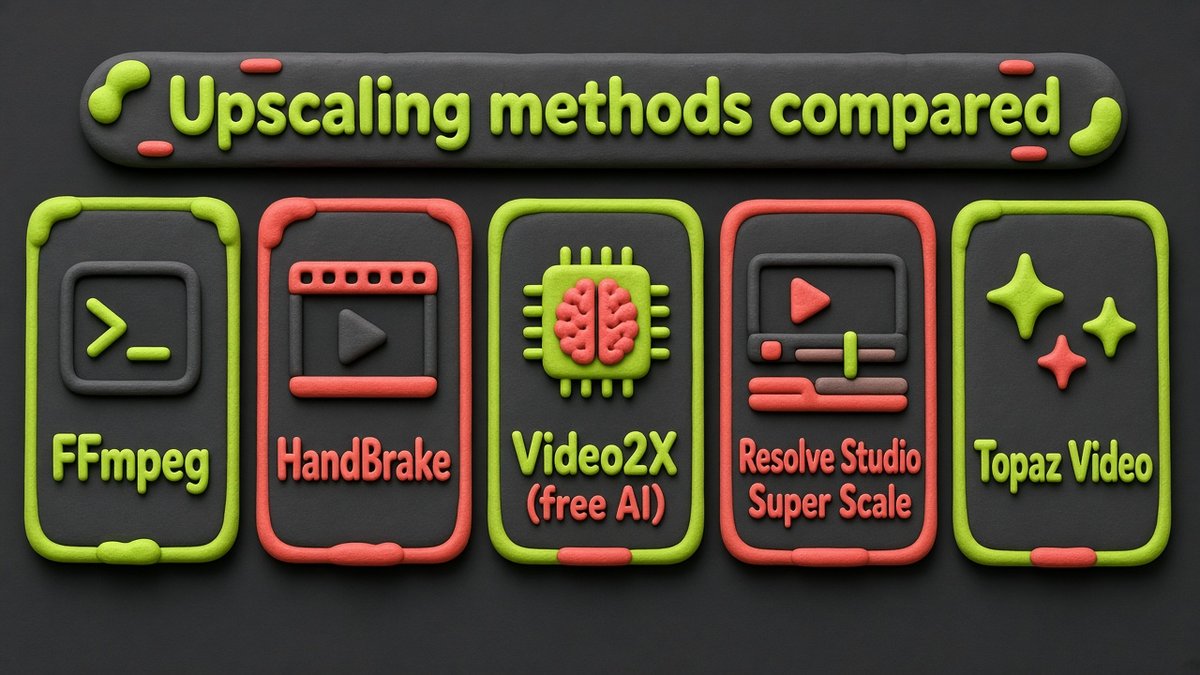
Here is how the main approaches stack up for everyday creators and small teams. Use it to pick a starting point before you download anything.
| Method | Cost (checked 9 Nov 2026) | Quality | Best for |
|---|---|---|---|
| FFmpeg scale filter (Lanczos) | Free, open source | Clean but no added detail | Fast batch resizes, matching a 1080p or 4K timeline |
| HandBrake | Free, open source | Clean but no added detail | Beginners who want a simple app with presets |
| Video2X (Real-ESRGAN and similar models) | Free, open source | AI detail, varies by model | Anime, screen recordings and older clips on a PC with a decent GPU |
| DaVinci Resolve Studio Super Scale | $295 one-time (Studio); free Resolve does not include it | Good AI-assisted uprez inside an editor | Editors already cutting in Resolve |
| Topaz Video | Subscription, $299/year | Strong AI models for upscaling, denoise and deinterlace | Restoration of old, noisy or interlaced footage |
How to upscale video for free
Start with free tools. For many jobs, such as fitting a 720p screen recording into a 1080p edit, a clean classic upscale is all you need, and nobody will notice the difference on a phone.
Option 1: FFmpeg (fastest, works on Windows, macOS and Linux)
FFmpeg is a free command-line tool that powers a lot of video software. To upscale a clip to 1080p with the high-quality Lanczos filter, run:
ffmpeg -i input.mp4 -vf "scale=1920:1080:flags=lanczos" -c:v libx264 -crf 18 -preset slow -c:a copy output-1080p.mp4Change 1920:1080 to 3840:2160 for 4K. A CRF of 18 keeps quality high; lower numbers mean bigger files. If your source is not 16:9, use scale=-2:1080 so FFmpeg keeps the aspect ratio for you.
Option 2: HandBrake (easiest app)
HandBrake gives you the same kind of scaling in a friendly window. Open your file, choose a 1080p or 4K preset, set the resolution limit in the Dimensions tab, keep the quality slider around RF 18 to 20 and start the encode. HandBrake will not invent detail, but it is ideal for consistent, predictable results.
Option 3: Video2X (free AI upscaling)
Video2X is an open-source project that runs AI models such as Real-ESRGAN, Real-CUGAN and Anime4K on your own machine. It shines on animation, slides and screen recordings, and does a respectable job on live-action footage. You need a reasonably modern graphics card and patience: AI upscaling to 4K can take many minutes per minute of video. Always try a short sample first.
How to upscale video with AI tools
If you work with old or difficult footage often, a paid AI tool can save hours of trial and error. The two most common options for creators are below.
Topaz Video
Topaz Video (previously Topaz Video AI) is a dedicated enhancer. It is subscription-only, listed at $299 a year when I checked, and includes many models for upscaling, noise reduction, deinterlacing, frame interpolation and stabilisation, plus a small allowance of cloud rendering credits. A typical workflow is: import the clip, pick an upscaling model (Proteus is a sensible all-rounder; Iris is tuned for faces), choose 1080p or 4K as the output size, preview a few seconds, then export. Check the system requirements first, because some models need a recent GPU or an Apple Silicon Mac.
DaVinci Resolve Studio Super Scale
DaVinci Resolve is free and excellent for editing, but Super Scale, its AI-assisted uprez feature, is part of the paid Studio version ($295 one-time list price). In Studio, right-click a clip in the Media Pool, choose Clip Attributes, set Super Scale to 2x, 3x or 4x, and adjust sharpness and noise reduction. The upscale happens inside your project, so there is no export round trip. If you already pay for Studio, try this before buying anything else.
🎯 Which should you pick?
Fitting clips into a bigger timeline: FFmpeg or HandBrake. Animation and screen recordings: Video2X. Old family tapes or noisy footage: Topaz Video. Already editing in Resolve Studio: Super Scale.
Step-by-step: a clean upscaling workflow
The tool matters less than the process. Follow these steps and you will avoid most of the disappointing results people blame on software.
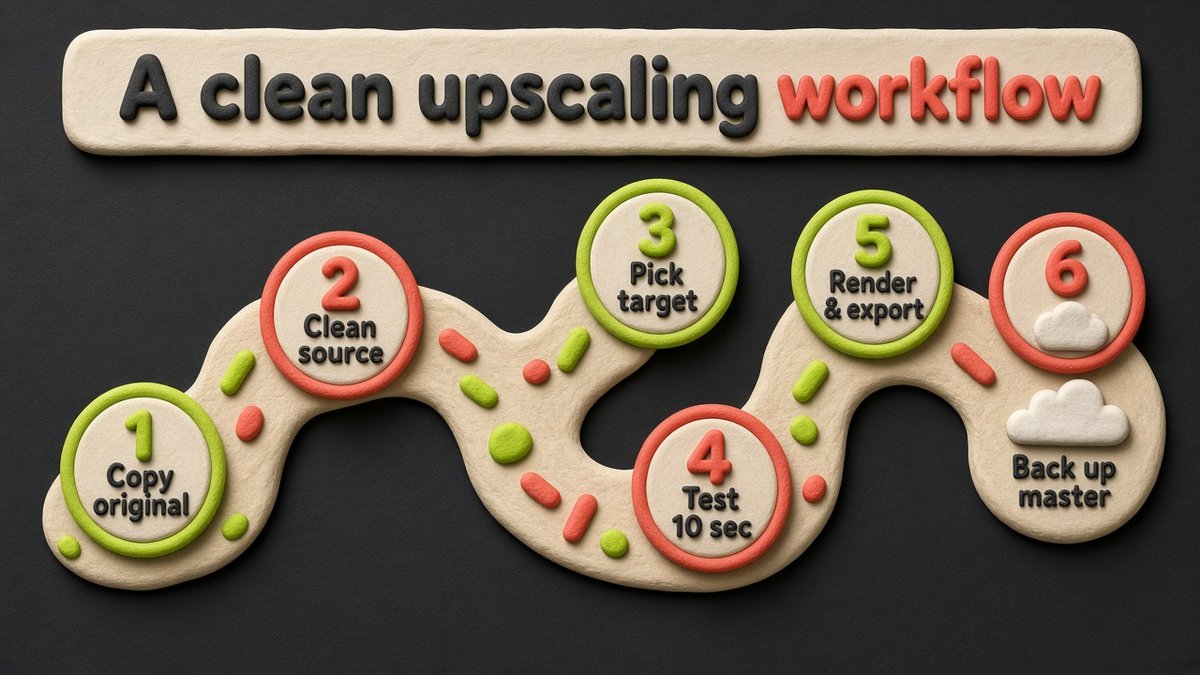
Copy and protect the original
Never work on your only copy. Duplicate the source file and keep the original untouched in a separate folder or backup, as I explain in my guide to backing up business data.
Clean up the source first
Deinterlace old TV or camcorder footage, trim unused parts and fix obvious problems such as wrong aspect ratio. Upscaling magnifies every flaw, so solve them at the original size.
Pick a sensible target
A 2x jump (720p to 1440p, or 1080p to 4K-ish) usually looks more natural than 4x. Only go to 4K if you will actually publish or display at 4K.
Test a 10-second sample
Render a short section with faces, text and motion. Compare it with the original at 100 per cent zoom and on the screen your audience will use, often a phone.
Render, check and export for the platform
Render the full clip, scrub through it for artefacts, then export with a sensible bitrate. YouTube and most platforms re-compress uploads, so a high-quality master is worth keeping for future edits.
Back up the master
Store the upscaled master and the original in two places, one of them off-site or in the cloud, then delete temporary renders you no longer need.
Plan your storage before you upscale
This is the part most tutorials skip. A one-hour 1080p recording might be a few gigabytes; the same video upscaled to 4K at an editing-friendly bitrate can easily be several times larger, and an AI workflow often creates temporary image sequences that need even more space. Multiply that by a library of old videos, webinar replays or client testimonials and an ordinary laptop drive fills up quickly.
A simple 3-2-1 rule works well: three copies of important footage, on two kinds of storage, with one copy off-site. For the off-site copy, cloud storage built for large media files is the easiest option. I use pCloud myself for my own archive, mainly because its lifetime plans are a one-off payment rather than another monthly bill, and because it streams video previews straight from the browser. If you are in Europe or handle client footage under GDPR, pCloud also lets you choose EU data storage in Luxembourg when you sign up. I compare it with the big two in pCloud vs Google Drive vs Dropbox if you want the full picture.
| Copy | Where it lives | Why |
|---|---|---|
| Original source | External drive or NAS | Untouched reference you can always go back to |
| Upscaled master | Your editing drive | Fast access for edits and re-exports |
| Off-site backup | Cloud storage (for example pCloud) | Survives theft, fire or a dead drive, and is shareable with clients |
Keep your video archive safe off-site
Store original clips and upscaled 4K masters in the cloud with a one-time pCloud lifetime plan, and stream previews from any device.
Affiliate link. I may earn a commission at no extra cost to you.
Common upscaling mistakes
- Upscaling an already re-compressed file. Use the highest-quality source you have, such as the original camera file, not a copy downloaded from social media.
- Jumping straight to 4K or 8K. Bigger is not always better; a sharp 1080p beats a waxy 4K.
- Over-sharpening. Halos around edges and crunchy textures look worse than slight softness. Dial sharpening back.
- Ignoring faces and text. These are where AI artefacts are most obvious. Check them in every test render.
- Forgetting audio and frame rate. Copy the audio track as it is and keep the original frame rate unless you have a reason to change it.
- No backup. Long renders crash, drives fail and files get overwritten. Protect the original before you start.
If you are upscaling recordings of live sessions for a course or replay page, my guide on how to host a webinar covers recording settings that save you from needing heavy upscaling next time. For more hands-on comparisons of software, browse my Reviews hub.
Frequently Asked Questions
Can you really upscale a video to 4K?
Yes, you can turn a 720p or 1080p file into a 3840 x 2160 video. Simple scaling only makes the picture bigger, while AI upscalers rebuild edges and texture so it looks sharper. Neither can recover detail that was never recorded, so clean, well-lit sources give the best 4K results.
What is the best free way to upscale video?
For a quick resize, FFmpeg or HandBrake are free and reliable. For AI upscaling without paying, the open-source Video2X project runs models such as Real-ESRGAN on your own graphics card. Test a 10-second clip first, because AI models can be slow on older computers.
Does upscaling a video improve quality?
Plain upscaling does not add detail; it stops a low-resolution video looking soft or blocky on a big screen. AI upscaling can make footage look clearer by sharpening edges and reducing noise, but it can also create waxy faces or odd textures if you push it too far.
How long does it take to upscale a video?
It depends on the length, the target resolution and your hardware. A simple FFmpeg resize can run close to real time, while AI upscaling to 4K can take several minutes per minute of footage, or much longer on a laptop without a dedicated graphics card.
How much storage do upscaled videos need?
Much more than the original. A 4K file can be several times larger than the same clip in 1080p, especially if you export at a high bitrate for editing. Keep the original, the upscaled master and a backup copy, ideally with one copy off-site or in the cloud.
Final thoughts
Learning how to upscale video is mostly about matching the method to the footage. Use FFmpeg or HandBrake for quick, clean resizes, try Video2X when you want free AI upscaling, and reach for Topaz Video or Resolve Studio when restoration really matters. Test a short clip, keep your original safe and plan for the extra storage before you hit render.
Affiliate disclosure: the pCloud links above are affiliate links, so I may earn a commission at no extra cost to you. I only recommend tools I use myself.